A couple of things I really like about the Ryobi compound mitre saw:
- it has a laser guide which allows you to cut exactly where you marked the wood.
- a simple but effective clamp to hold the wood in place and make sure your fingers are nowhere near the blade.
- a great sliding action for larger pieces which allows a really smooth cut and allowed good control.
- An easy to use mitre setting, you simply swing the front arm until it gets to the correct angle that you want, then lock it firmly into position with the front lock.
You can see below how clearly the laser line marks the wood, it is easy to match to the pencil line and make a really accurate cut.
To make your own basic floating frame you will need:
- Any canvas - mine was a failed painting hiding in the garage
- Wooden trim slightly wider than the depth of the canvas frame
- Enlarged photo copy an image you like ($7 for B1 size at Officeworks)
- Magic tape
Make as follows:
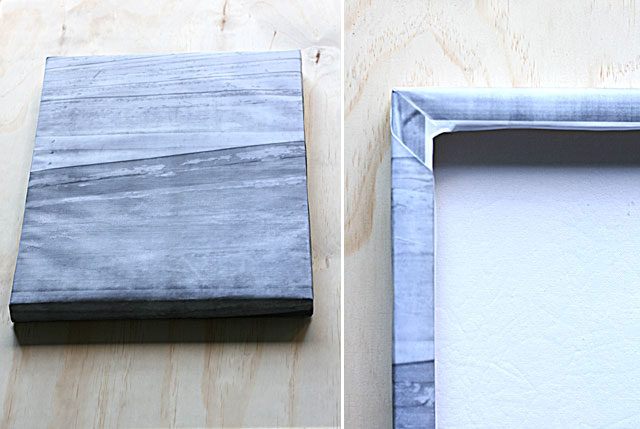
- Tape photo copy to the front of the canvas, like wrapping a one sided present. Make the corners as neat as possible and tape down securely.
- Cut long sides of wood trim - measure them to be the same length as the canvas sides and mark the cut line in pencil with a set square.
- Turn the laser guide on, match up the red laser line with the cut on the wood and lock wood securely into place.
- Clamp both side pieces to the sides securely and get your nail gun. (Love the nail gun) Nail trim at left, then at right. Start at the side so that you can adjust the piece if you need to. This is the work of minutes and really really fun!
- Cut the trim for the top and bottom pieces of the frame. Measure these pieces from the edges of the already attached trim.
- Cut, clamp and nail gun in place as before.
Yes it really was that easy.
What I really liked about the Ryobi Airstrike nail gun:
- This model compresses its own air and doesn't need a stand alone compressor or canisters. Less things to hire, buy and store.
- Not to heavy, easy enough for a non-chippy like me to use
- An easy nailing action and the ability to set nail depth
- I cannot hammer in a nail straight, but with the Air Strike...to easy.
I am going to be making so many things with these fab new additions to the tool shed.
So this was really a very easy test, I just couldn't wait to make something and give you a little feedback. Mr B will be putting them through their paces when he replaces the cladding in the Currawong Cottage entrance. I am thinking I may make a tray next, I want to test out the mitre capabilities.
Tools were provided by Ryobi but all opinions are as always my own.


